How to Choose a Good Target Image for Tracking in AR - Part 2

This article is part of a series that discusses the theories and practical examples on improving AR image tracking. Please refer to Part 1 for introduction.
In this part of the series, we will dive into the fundamental principles in image tracking and explains how it works from image pixel level. Let's get started!
How does Image Tracking work
Image tracking fundamentally boils down to feature points detection and matching. To simply put, feature point is just a patch of pixels around a certain location of an image. Matching, on the other hand, means finding patches of pixels (in different images) that look alike.
Feature Points
I'll use a simple example to illustrate what that means. Let's say our target image is just an isosceles triangle below. Now consider patch of pixels (square size in this case, but not necessarily) in 4 different locations. The first question is very simple. If you are given one of these patches, are you able to locate it in the image.
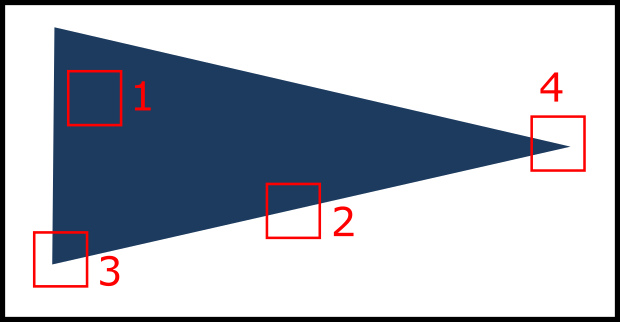
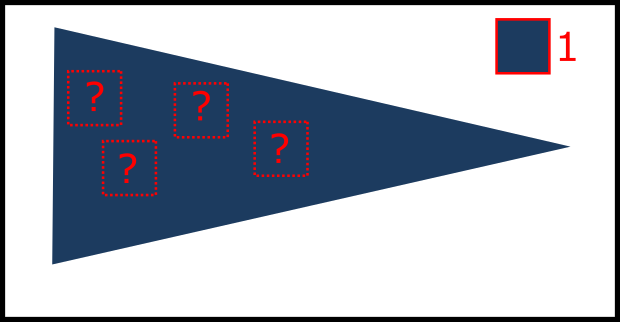
Patch 1 is obviously bad, because everything inside the triangle look exactly like this.
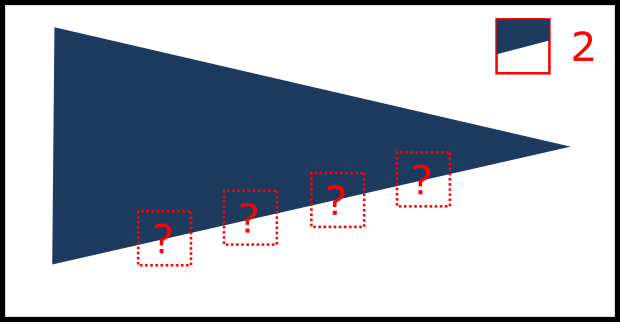
Patch 2 is also bad, because everything along the edge is the same.
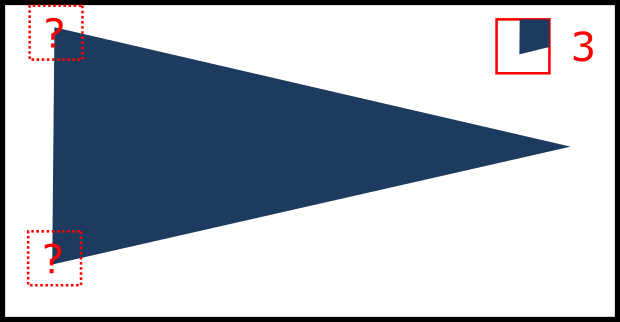
Patch 3 seems unique at first, but if you flip the image, it looks exactly the same as the other corner. This matters because when you are trying to match this against a second image, that second image probably has a different orientation.
Patch 4 is the only unique patch of pixels that cannot be find elsewhere. In fact, it's the only unique patch in this image.
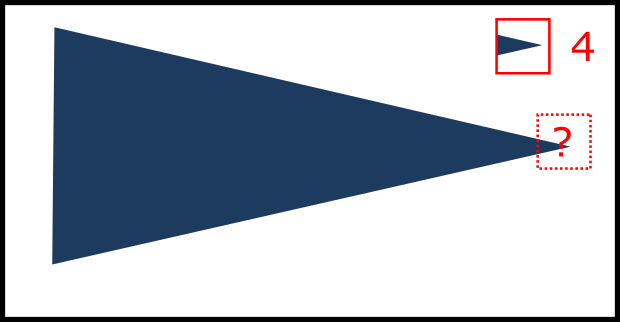
Theoretically speaking, any patches of pixels can be feature points. However, the uniqueness and identifiability of the patches defines its quality. In this case, patch 4 is the best feature point, followed by patch 3. Patch 1 and 2 are almost unusable because they can be poorly located.
Practically speaking, when we say feature points, we usually refer to those patches that are useful. The process of finding those feature points is called detection. After that, we will try to match them.
Matching
So now we have a unique feature point (patch 4), it should be good enough for matching, right? Yes, and no. Patch 4 might be unique in the target image itself, but it might not be unique in another image, for example:

In fact, no matter how unique it is, a single feature point by itself is usually very ambiguous to be searched for. But can we still locate the isosceles triangle? yes! because we don't need to limit ourselves of matching only a single feature point. If we use all 3 corners of the triangle, plus their relative positions, we can eliminate all incorrect candidates. Moreover, these 3 points allow us to extrapolate the whole triangle with some simple mathematics.

Quick Summary
Now you know how image tracking works in a nutshell! It's really not that mysterious. We detect feature points from a target image, search those feature points in another image, and then compute the location of the whole target using multiple matched points.
Feature Points Distribution
Another important concept you should be aware of is feature points distribution. It affects the extrapolation result after feature points are matched. Let's consider a more complicated shape (a new target image) below, and we have two different potential sets of feature points (i.e. green and red) for matching.
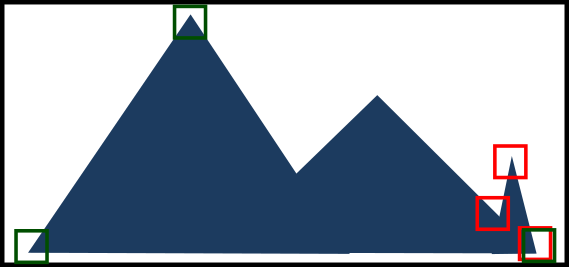
In both sets, we have no problem locating those 3 points in the second image, and then extrapolate the whole target. In a perfect world, they have no difference.
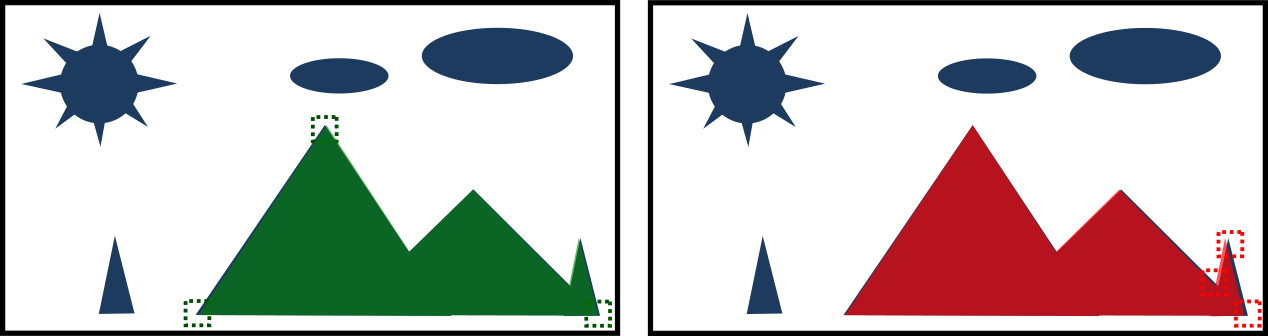
However in a realistic world, there is always error in mapping (i.e. the mapped positions are off from their perfect positions). For example, let's say two of the mapped points are shifted to the right by 5 pixels like below. Even though they have the same errors, the final extrapolated result of the whole target differs by a lot!
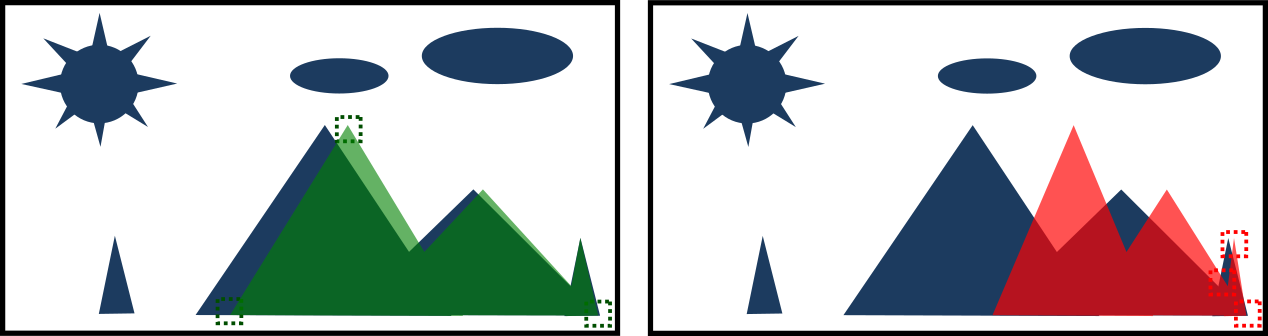
The important takeaway is that, the better the distribution of feature points, the more tolerant they are to errors. More specifically, you should aim to have feature points exist across every regions of the target image, rather than to have them densely gathered in some regions, leaving the other regions empty.
Realistic Example
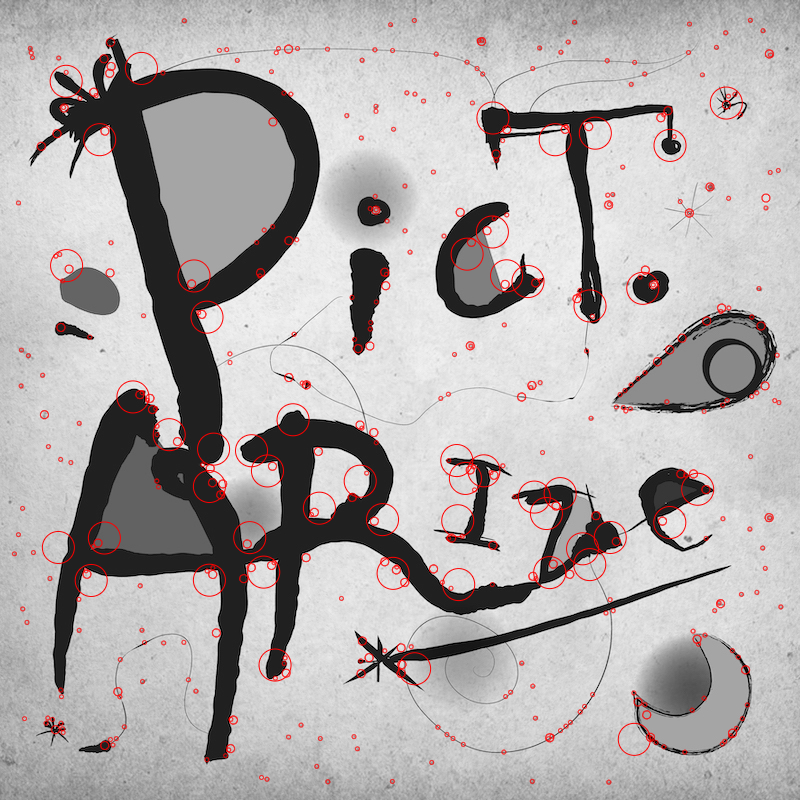
In real life though, a simple isosceles triangle is probably unrecognizable. A typical target image and its feature points probably look something like this:
and matching of those hundreds of feature points in real environment looks something like this:
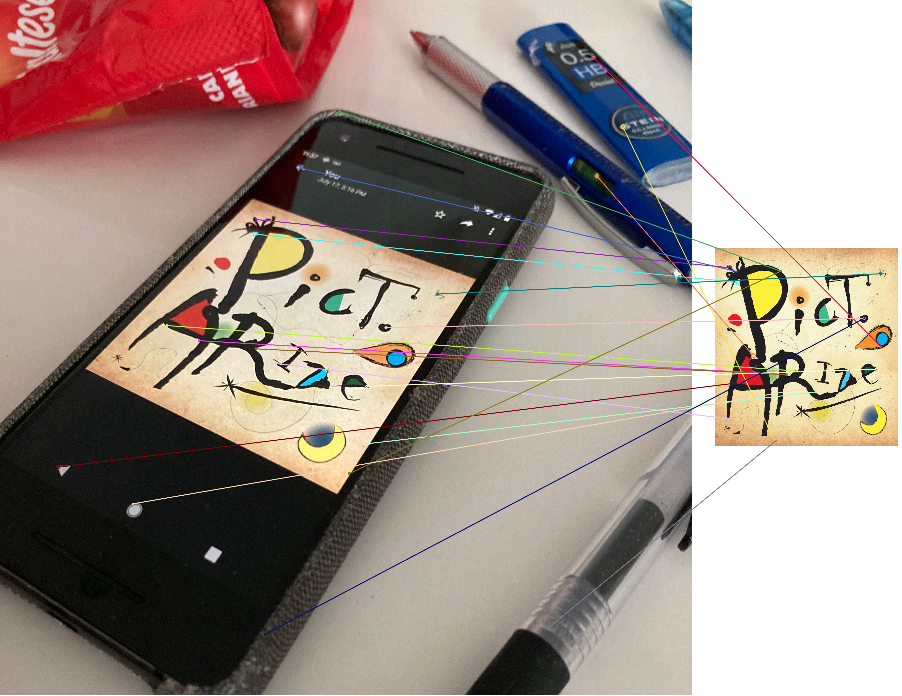
As you can see, there are a lot of incorrect matches. Whether we can eventually locate the target will depend on the ratio of good matches against bad matches. To have good matches, we will need good feature points. Therefore, your choice of target images plays a vital role in the tracking performance.
Summary
That is the fundamental of image tracking. It's all about detecting and matching feature points. Although you cannot improve the AR engine, you can definitely choose an image that the engine loves!
To summarize, your job is to ensure the target image contains:
- good feature points that are distinguishable
- a lot of good feature points, together the image as a whole can be located
- a lot of good and well distributed feature points, to make it error tolerant.